Pammy Blogs Beauty: Highlights


Showing posts with label Highlights. Show all posts

Monday, April 2, 2018

Keeping My Highlighted Hair Healthy with Kenra Platinum Luxe One Leave-In

 Affiliate Link Press Sample
#KenraPlatinum  #KenraProfessional
 #ShineLikeGold  #FreeProduct
@KenraProfessional


Keeping My Highlighted Hair Healthy: 

Keeping my blonde hair healthy is one of the biggest aspects of my overall beauty routine. It is also a driving force behind my blogging: finding products to keep my blonde hair looking and feeling healthy. Let's face it...I pay *cough* way too much for my highlights. Not that I am looking for expensive highlights. It is just that getting highlights done every 8 weeks adds up! It is where I put the bulk of the money that I set aside for my beauty budget. So, I look at my hair as a bit of an investment. After paying for highlights at an upscale salon, you know that I am going to treat my hair with the very best products that I can find. So, I am always on the hunt for good hair care products. From drugstore to high end and professional products, I am always on the search. I want to use the very best products that I can find! 

My Hair:
As I mentioned my hair is heavily highlighted. It is shoulder length and very thick. I typically style it straight. It is naturally straight. However, I do have some wavy patches in the back around the crown area. It is somewhat dry and damaged from the highlights. Also, I am growing out some breakage from a botched baylage experience at a previous salon. So, I am always looking for products that moisturize, protect, smooth, and repair. 

Kenra is a brand that I have used and trusted over the years. Kenra Professional®  is a purely professional brand that creates innovative products that deliver real results. Kenra Professional® includes three unique brands, Kenra, Kenra Platinum, and Kenra Color. Each of these lines are driven by the daily needs of stylists. 


Using a good leave-in is a hair care step that I never skip! Leave-in sprays can provide just that extra condition and manageability that my hair needs. Plus, my hair can be very difficult to comb out and is very prone to tangles. So, using a leave-in can make all the difference.

I use this product 2 ways. To use after showering and washing my hair, I shake the bottle and then spritz about 2-3 sprays into the ends of my hair and then smooth it through and distribute with my hands and then follow it up with combing. The other way I use it is as a smoother/refresher on dry hair or 2nd day hair. To use in that way, I just spritz a small amount on my hands and then smooth it over my dry hair. This instantly smooths hair and provides shine.

This product smells amazing!!! I find that it provides excellent heat protection. Plus, it helps my hair to behave much more manageably. My hair is easier to comb out when I use this product. Plus, I can be confident that it is protecting my hair from heat and from breakage. I feel that my hair has more movement and shine when I use this product. Overall, I am very impressed and really enjoy using this! At $25, this product is on the expensive side. However, you really do not need much product for it to be effective. So, a bottle will last you a long time. 

Kenra Platinum Luxe One Leave-On Details from Kenra:
The NEW Luxe One Leave-In from Kenra Professional is an all-in-one miracle spray enriched with precious gold for opulent slip and lustrous shine. This versatile fine mist leave-in provides heat protection up to 450 degrees F and leaves hair stunningly silky to the touch. 

- Provides lavish manageability
- Adds lustrous shine 
- Repairs dry, damaged hair
- Provides thermal protection up to 450 degrees F
- Controls frizz & flyaways
- Increases silkiness
- Protects & seals hair color
- Prevents split ends
- Protects against breakage
- Enhances natural body

This product retails for $25 and is available at Ulta Beauty and salons nationwide.


Affiliate Link

Monday, October 30, 2017

Extend and Enhance Your Highlights with SunIn: Not Just for Summer!

 Sponsored Post Affiliate Link Press Sample
This post has been sponsored by the PRIMP Network. All opinions are my own.


Extend and Enhance your Highlights with SunIn:

Blonde hair is not just for Summer! I love the natural lighening my hair gets from the Summer sun. There is no doubt, the sun-kissed look of Summer blonde hair is gorgeous. However, now that the Summer is gone, we don't have to say buh-bye to our blonde hair. That is right, you can hang on to that sun-kissed look all year round with SunIn! 

SunIn is honestly a product that I have used on and off since I was a teenager. Yes, SunIn has actually been around since the 70s and they are still going strong. So, they must be doing something right! When my hair was mostly its natural color back in the 80s and 90s, I would use Sun-In in strategic spots and streaks throughout my hair to give it "natural" highlights. My hair is naturally dark blonde. So, SunIn lifts it to a lovely blonde shade. This method works both with the sun and with a hair dryer. That is right, no need to give up on your blonde just because the Sun isn't out. SunIn is just as effective with a hair dryer! 


Extend Time Between Salon Visits with SunIn:
While I used to use SunIn all over my head in the past, I must mention, that I now get my hair professionally highlighted. However, I still almost always have a bottle of SunIn on hand for home touch-ups. While I do trust the bulk of the work to the professionals, strategic placement of SunIn at my root area can stretch out my time between salon visits. I mean, we all know how expensive those foil highlights a balyage looks are! You can save so much money when you can stretch out your salon visits a bit further.


Also, I tend to get partial foil highlights at the salon which leaves my underneath layers primarily untouched. So, I like to go in with SunIn around those underneath areas for general lightening. When I go in with SunIn at my root area for touch-ups, I just spray a bit onto the cotton ball and spradically dab it to my root area. Then I follow up with my normal blow drying. The effect is subtle but noticable to me. I feel like my roots look less noticable when I do this.


Like me, my son has dark blonde/light brown hair. At his last hair cut his hairdresser noticed the grow out of his natural sun-streaks from playing outside. I am certainly tempted to use SunIn on him to extend the look of his natural sun streaks from summer.


As a dark blonde, I can tell you from years of experience with this product that it works extremely well for my hair color. It lightens me to a light/bright blonde. It gives me really natural looking highlights, just like the way the sun would naturally lighten my hair. So, yes, SunIn works beautifully for blondes...but, there is more: SunIn wants you to know that this product isn't JUST for blondes! It brightens from blonde to medium- brown hair, too!


SunIn is so fast and easy to use. Just spray it in and then either sit in the Sun or use your blow dryer to dry your hair. It is honestly so easy and user-friendly. Just spray or dab strategically and that is all of the work it takes. Plus, Sun-in is alcohol free. It conditions while it lightens. 

You can find SunIn here! :) Happy lightening! Get your Summer blonde look year-round. No reason to say buh-bye to sunkissed hair! Or if you are like me and like to stretch out those salon visits, you might want to use Sun-In strategically at your roots to give yourself more time between full salon visits.

Overall, I really love using SunIn! SunIn gives you the same natural highlights you get from the sun ...only faster! SunIn contains an advanced conditioning system which includes botanical extracts and special illuminators that give hair an extra dose of shine.


'


Affiliate Link

Thursday, September 15, 2016

Modern and Natural Blonde Highlights: Transition from Foil to Bayalage with Lindsey Ryan

Affiliate Link Blogger Discount


Modern and Natural Blonde: 
My Transition from Full Foil Highlights to Bayalage with Lindsey Ryan

I have been doing full foil highlights for what seems like years...actually, gasp, decades! Anybody with me here? While I have varied from natural blonde with lowlights and highlights to heavy bleach highlights, one thing has remained constant: the foil highlighting method. 

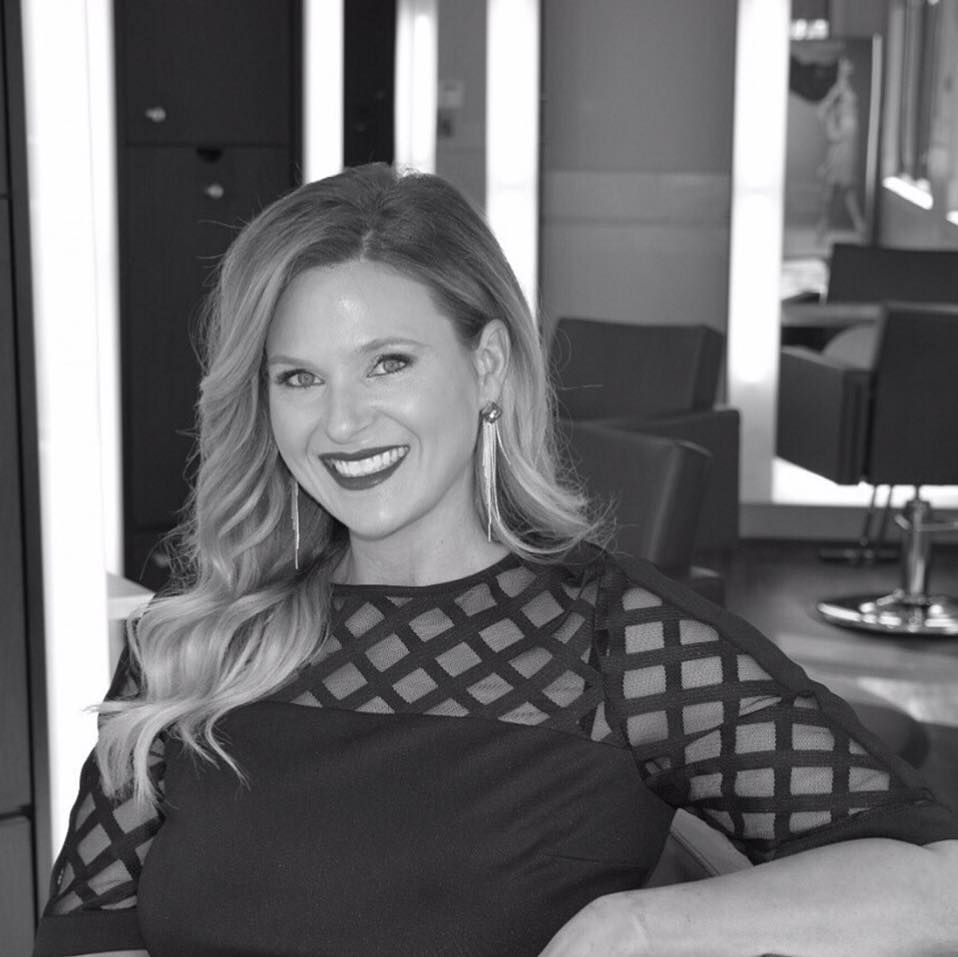
So, what prompted this change? Well, for starters, I have found a fantastic hairdresser who I really trust: Lindsey Ryan at Keri Gold Salon in Buckhead. I have been going to Lindsey for cuts, highlights, and keratin treatments for about 6 months. I must say, she is the best hairdresser that I have had in years! She gives fantastic precision cuts and is particularly talented with color. Since first meeting Lindsey, she has talked to me about the Bayalage highlighting method. It is one of her specialities. So, that certainly started my interest in the Bayalage method. 

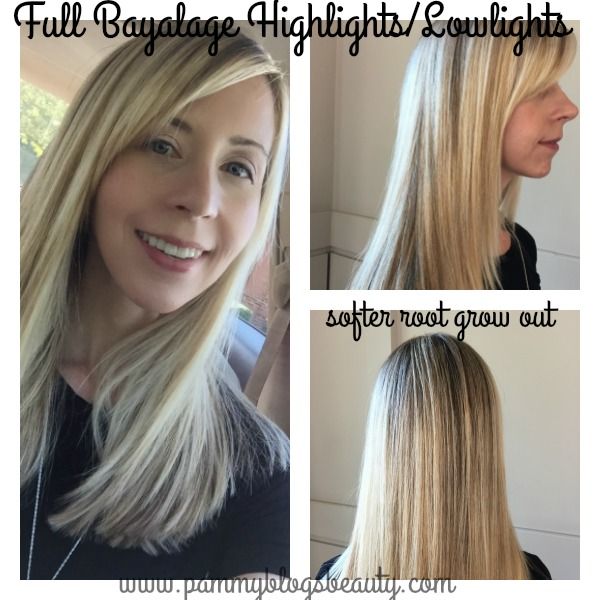
So, I started pinning Bayalage highlight ideas like crazy on Pinterest. The look is just so much more modern and natural than my classic foil highlights. Bayalage gives you a more "rooted" look with a softer grow out. I love this idea! Typically my roots start driving me crazy in a matter of weeks. Bayalage blends out the roots more and gives you more time in-between colorings. 

So, I decided to go for a Bayalage change. I was coming from full heavy bleach highlights. My highlights were practically solid and very heavy blonde. Lindsay wove in both bleach highlights and darker natural lowlights with the Bayalage method. If you have never had nor seen Bayalage, it is a unique method. The color and bleach are painted on strands of hair and layered on top of and beneath many layers of plastic cling wrap. Overall, the method seems to have more freedom and artisitic expression in the application (where foil highlights seem more methodical). 

Lindsay was able to beautifully transition my hair from full heavy bleach highlights to a more natural and rooted look using Baylage highlights and lowlights. Not only am I loving my subtle color change, but also I am loving the softness and condition of my hair! I have gotten a ton of compliments on my color and am just thrilled with the results. 

One of my biggest concerns with going to a new colorist is their ability to achieve beautiful results while still maintaining the integrity, strength, and condition of my hair. There is no question that my past six months with Lindsay Ryan has had a positive impact on the condition of my hair. Before going to Lindsay, I was having trouble with breakage and damage despite my hair care arsenal of awesome products and my diligience with conditioning and protein treatments. Over time, since going to Lindsay, my hair's condition has certainly improved. This is a huge deal for me and one of the biggest reasons that I recommend Lindsey Ryan for hair in Atlanta! 

So, what is my next plan with my hair? Well, I want to continue with the Bayalage method. I would love to have Lindsay add a few more lowlights next time to blend in more of my natural color even more and give an even thicker rooted look. She did a subtle change this time around to see how I liked it with the idea that we could go heavier with the lowlights next time. The results are beautiful and I am so happy with my hair! 


More About Lindsay:
You can find Lindsay at Keri Gold Salon in Buckhead in Atlanta, GA. Lindsey is originally from Kansas. While she is still somewhat new to the Atlanta area, she is not new to hair! She has over 16 years of salon experience. Lindsey was initially trained and educated with AVEDA but also has Vidal Sasoon and Davines training. Lindsey is fabulous and so professional! She is in touch with the latest techniques in color and cutting. Her special areas of expertise include extensions, balayage, and precision hair cutting. I am impressed with her skill and expertise and highly recommend her! Want to see more of Lindsey's work? Be sure to check out her pics on Instagram and follow her there! :) 

You can find Lindsay here:
#LindseyRyanHair


Affiliate Link

Wednesday, October 20, 2010

Protein Treatments Series: There is help for seriously damaged hair!!! Aphogee review


Aphogee 2-Step Protein Treatment: The "Cure" for Extremely Damaged and Broken Hair: 
There is no question, nothing stops hair breakage and hair damage better than this product! Introducing: Aphogee 2-Step Protein Treatment! This amazing miracle of a product has saved my hair time and time again. I have tried a ton of protein treatments. From high-end, to salon formulas, to drugstore products...nothing beats Aphogee. Hands down, it is the best! I first found this product years ago when trying to save my hair from some serious chemical damage (more on that below). Since then, I have continued to use the Aphogee 2-Step Protein Treatment, without fail, before and after every single highlighting appointment that I have. This has saved my hair and allowed me to grow very long, thick, and healthy hair that also happens to be heavily highlighted! What can I say? Aphogee works and I have turned many of my friends (and blog readers, too) on to this product and they agree, too!

How Does Hair Get Damaged?
Chemical processing (highlighting/coloring or perming) works because your hair cuticle is being physically transformed by chemicals in order to change the color or texture of the hair. It literally takes the protein right out of your hair. The desired color or texture can be fantastic; but, you will pay the price with some damage. So, you need take very good care of your hair.

Well, the good news is that there is "help" for damaged hair! Protein treatments are the best way to combat damage from chemical processing. Strengthening your hair with protein will protect your hair from breakage. Protein adds strength, but not moisture. So, it is always good to follow up a protein treatment with a moisturizing one.

My "Protein Treatments Series” blog posts will cover a variety of Protein treatments currently available. So, keep an eye out for future "Protein Treatment Series" reviews. I choose these products from my years of testing out various products, doing online research for good reviews, and tips/recommendations from my hair stylists.

The ApHOGEE Two Step Protein Treatment is the strongest and most effective protein treatment that I have used (the "mother" of all protein treatments). It is somewhat tricky to use (and a lengthy process), but the results are worth it if your hair is very damaged.

Background info: My severe-hair damage story:

I found out about this treatment while doing research online after having my hair practically *ruined* by a bad colorist. My hair literally felt like "mush". It’s hard to explain...but, when the cortex of the hair gets damaged, the hair becomes VERY fragile and feels sticky when wet and "mushy". This is the type of damage that most hairdressers would tell you to cut off. Well...luckily I stumbled upon this miracle treatment that, over time (and new hair growth) helped my hair. You can't really "repair" cortex damage. But, a good protein treatment can help manage the problem.

Now that my hair is in good condition, I use this treatment as a preventative measure to ward off hair breakage (especially since my hair is very long). By using this, I can get my hair heavily highlighted with minimal damage. Aphogee recommends doing this treatment one week-48 hours prior to hair coloring or highlighting.

If you do not have damaged hair or do not highlight your hair, then this treatment might not be for you. So, if you have healthy hair...you probably don’t need this. I find the results of the Aphogee 2-step treatment are unparalleled. This is the absolute *best* hair treatment on the planet for severely damaged hair. Severely damaged = breaking off when dry, "mushy"/sticky when wet, or hair that is so damaged that it won't hold color.

Be forewarned readers, this treatment smells REALLY bad! We are talking rancid, somewhat "cat pee" smelling product. So, just consider yourself warned
about the smell! My husband and I jokingly call this the "stinky treatment". But, hey...if it works...!!!


Tips for how to use the Aphogee 2-Step Protein Treatment: 


1. Wash your hair with a detangling shampoo (I like to use Redken All Soft Shampoo).


2. Towel dry hair and gently comb out.


3. Drape a towel around your shoulders and secure (this treatment will drip and you don’t want it on your clothes). I even place an old towel on the floor to catch any drips.


4. Thoroughly shake your bottle of Aphogee 2-step treatment. Saturate your hair with the product and comb through. Try to work quickly as this product will eventually harden. *be very careful to keep product off of skin and do *not* get in your eyes. I keep a wet washcloth nearby to wipe any drips as the product can really irritate your skin...and it will drip.


5. Blow dry hair. This could take between 45 mins-1 hour depending on how damaged your hair is. I usually go about 45 minutes myself. This is important: Do not move nor agitate your hair when drying. Hair will become rock-hard and if you move it while it is hard, your hair will break. Keep blowing it dry until your hair is as hard as a rock. You will know. Just when you think it is hard...it will get *harder*


6. *gently* remove your towel (it will be under your hard hair (which can get stuck sometimes on the towel)


7. *gently* rinse out product in the shower with warm water. Note: do not agitate or move hair until product is rinsed out. Remember to be careful as hair can break as long as it is "hard"...once product is rinsed out you can "move" your hair again just fine! And, I promise, it does rinse out! 


8. Towel dry hair


9. Apply a VERY moisturizing conditioner or conditioning masque. I like the L'Oreal Natures Therapy Mega Moisture Cream (this is also from Sally Beauty Supply). Slather on a generous amount of moisturizing conditioner and cover with a plastic cap. I then proceed to cover my hair with a heat-cap (I use the "micro hair cap" that I found online), but if you don’t have a heat cap, a hot towel will do. Leave on from 20-30 minutes.


10. Rinse out conditioner.


11. Optional step: To maximize results before coloring/highlighting. Use Roux Porosity Control. Apply after rinsing conditioner. Leave on a few minutes and then rinse out. This equalizes the pH I believe and helps color adhere better as porosity is controlled. 


12. Rinse and style as usual.

Note: you can get most of the products mentioned at your local Sally's Beauty Supply

How it works:
The heat allows the protein in the Aphogee to create a bond with your hair and elimate breakage. The packaging guarantees "no breakage for 6 weeks"...and honestly ya'll...that is the TRUTH.

I now do this treatment both prior to and post highlights (and that might be over-kill on my part, but it has been working!)...and my hair is absolutely healthy and VERY long.

Good luck if you try this treatment! And, remember to consult a professional if you have any questions! I know that for me...this hair treatment has been a total "lifesaver" for my hair!

Whew, that was a long post! :) Hope this helps someone out there!!! I swear by the Aphogee 2-Step Protein treatment. I just love it and it keeps my hair healthy and practically damage-free! Honestly, I don't even know what I would do if they ever stopped making my miracle Aphogee product! If you have damage, I highly recommend this product for you. Yes, it is a lot of work and a long process. However, it is 100% worth it for the results!

Aphogee has some other great products in their line besides the Aphogee 2-Step Protein Treatment. Be sure to check out these other items that I recommend from the Aphogee line, too! In addition to the 2-step Protein Treatment, I also particularly love the Keratin and Green Tea Reconstructor and the Keratin 2-Minute Reconstructor. I like the Keratin and Green Tea Reconstructor as a detangler and strengthener after every shampoo and the Keratin 2-Minute Reconstructor every other week in the shower to give my hair a protein boost in-between my Aphogee 2-Step Protein Treatments.

Other Great Products from Aphogee:


*disclaimer: This product is "for professional use only". I am not a hair care professional, just someone who purchases and uses this product. Please consult a hair-care professional before using this product on your own. Using it after color can strip out your color. So, generally, safe for use *before* coloring or highlighting. This is a VERY strong product please be careful and use caution! Please follow the instructions listed on the product. And, if at all in doubt, please have a professional apply this product.


Google Analytics Alternative