


I am so very excited to share this review with you today!!! This home UV nail system by Knockout Nails has totally revolutionized my entire nail care routine and my nails have never looked better! Yes, this is a UV gel nail system that you can use at home.
My Nail Background:
My nails are thin, short, peeling, and weak. When I am diligent about applying protein nail builders, take my Biotin vitamins, and consistantly care for my nails...they look good and appear healthy. But, often I get busy and can't get to my nails as frequently as I like. It has gotten even harder to keep nice nails with an infant at home.
In the past, I used to get acrylic nails, gel nails, and acrylic nails with a UV gel top coat. I loved how my variations of acrylic and gel nails kept the polish looking clean and neat until it was time to hit the salon again. But, I absolutely hated the associated damage to the natural nail. Plus, who wants to trek over to a nail salon every 2 weeks and inhale those polish fumes. The other caveat is that with acrylic nails and/or a UV gel topcoat you are not able to change your polish frequently...and if the fun thing about polish is switching it up, right?!?! So, what's a girl to do? Short of having your own in-home nail technician, a home UV gel system seems like the ticket.
But, will a home UV gel system damage your nails? Will it be too difficult to accomplish at home? Will it be too time consuming? I had all of these questions in mind before trying the Knockout Nails system.
For my full review on the Knockout Nails system, step-by-step how-to's and my results, photos, and a discount code for all you readers...please continue reading after the page break.
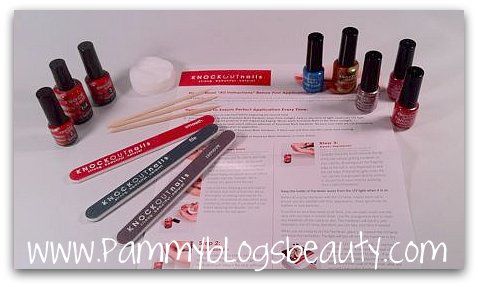
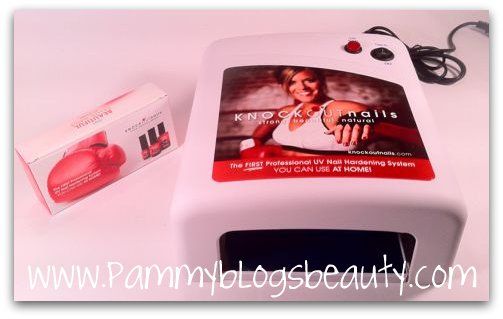
- Knockout Nails UV Nail Lamp
- Knockout Nails Cleaner
- Knockout Nails Bonder
- Knockout Nails Hardener
- 3 Knockout Nails Files (file, smooth, and remove)
- 3 Orangewood Sticks
- 24 Lint Free Cleaner Pads
The System also comes with a Free Gift:
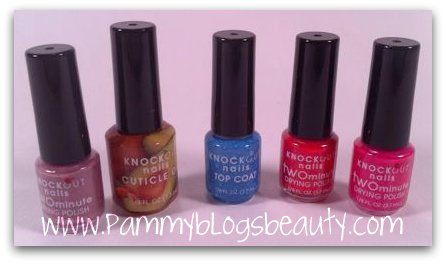
- Knockout Nails Cuticle Oil
- 3 Bottles of Knockout Nails 2 Minute Drying Polish (all cute colors)
- Knockout Nails Topcoat
There really is no reason to not try this system. Especially since there is a no-risk 90 day money-back guarantee. I am thrilled that Knockout Nails wanted me to test this kit. There is no question I will be continuing to use this system!
Steps: (adapted from product insert)
1. Buff and Clean Nails: You will get your best results with well-prepped nails. File nails and gently push back your cuticles. If you have had previous hardener on, use the "smooth" file to remove gloss from nail. Then use the lint free pad to apply cleaner to nail.
2. Apply Bonder: Apply to entire nail surface including nail tip. Don't skip the tip!
3. Apply Hardener: Apply a thin coat starting 1/8 inch from cuticle. Be sure to include application of nail tip! Don't forget the tip here either!!! Put hand in UV light to cure. UV gel will be dry in 2 minutes. Apply 2nd coat of hardener and dry 2 more minutes under light. There is a red button on the UV light unit that times 2 minutes and automatically shuts off. It couldn't be easier!
4. Cleaner: After the final hardening of the hardener coat, use the same pad from step one (lint free cleaner pad with cleaner on it) to remove remaining adhesive off surface of nails.
That is it! You are finished!!! The result is a high-gloss clear gel shiny coat.
*The first time I used the system I was a bit sloppy in application and didn't get all of my tips coated sufficiently. I found that after a few days of wear that my polish was rubbing off the tips as there was no Knockout Nails gel in that area. Now I am more careful in applying and the tips wear just fine now!
If you want color, your next step will be to apply your color polish. You can use Knockout Nails polish or your own polish (love, love, love that!). For best results, apply a layer of Knockout Nails Bonder between your Knockout Nails and the color polish.
The Results:
I love the results!!! The Knockout Nails themselves leave a high gloss shine when worn alone. When topped with polish you get massively good wear from your polish. Honestly, it improved the wear of all of the polishes that I wore! With careful application of the Hardener Knockout Nails coat (don't forget those tips ladies!), you polish will wear 2+ weeks! Also, my nail surface is so smooth with the gel coat. My manicures look fantastic and I couldn't be happier. This has absolutely changed my nail care routine! No more chipped and peeling manicures for me. I mean, I hate those. But, when I get super busy...sometimes even a beauty-blogger like myself ended up with peeling nails. But, no more!
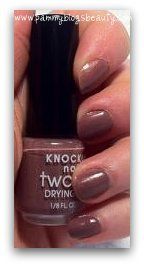
Here are my Knockout Nails!!! (pardon the cuticles ya'll...too much handwashing with an infant at home!) I really love this Knockout Nails polish shade too! A very pretty soft slightly cool-toned brown cream. This swatch is with just one coat (next time I will use 2 of this shade).
- As I have mentioned, I love that you can use your own polish with this system . You can either go 2 or more weeks between color...or change up your color as often as you like! In the past, the downside to salon UV or Acrylic manicures was that I was tied into one color for 2 weeks. With Knockout Nails you have the freedom to change color frequently!!! Also, while you can use your own polish, I did enjoy using the polish that comes with this system as well.
- This system is totally user friendly. I know it seems like a lot of steps. But, honestly, it is even easier than it seems!
- Concerned with nail damage? I am too. This system did not damage my nails. No, I did not completely remove the Knockout Nails gel. But, the beauty is that you don't have to! You just buff down the edges and apply your next coat of Hardener. (note: If you do want to completely remove, you can buff down the Hardener coat with the "remove" file).
- UV exposure: As someone with skin cancer in the family, I do worry about the UV exposure. If you are like me and worry about that, then use a SPF hand cream before doing your nails.
Get used to me mentioning this system! I have a feeling it will end up in quite a few "Monthly Star Products" posts. The system is fun to use and easy! Plus, I am loving the results!!!
Interested in trying this yourself? Well, you Pammy Blogs Beauty readers are in luck! Knockout Nails gave me a code for you guys for $20.00 off! Just enter the code: "KONPBB". This system retails for 1 Payment of $119.97 or 3 payments of $39.99.
Have any of you tried Knockout Nails or another home UV system? How do you think they compare to the salon systems? I would love to hear!
Thanks so much for reading!


Thanks so much for reading!

4 comments:
I'm loving the sound of this kit!!!!!!! I seriously wish I had the money to spend on it- I change polish every day most of the time and although I try to be good about keeping up with cuticle care and moisturizing, I have a couple nails that just won't cooperate and break/peel.
Anyhoo, I wanted to test the code you gave and entered it on the site= it gave a $40 discount! Bringing the kit to only $79.97. Seriously, someone buy me this! lol, thanks so much for the review and coupon code!! =0)
@Laquerish-I hope you are able to get this kit! It really is *that* good!!! I am wih you...peeling and dry nails and cuticles. It is a difficult mix. Besides this kit, the only other things that I have found to really help with that are Nailtiques Formula 2 Nail Protein (have you tried that?) and LUSH's Lemony Flutter Cuticle Butter.
dang! The other day it was still $40 off, but I tried it tonight and they changed it to $20!!
FOILED!!!!
*sigh* I'm trying to sell enough polish to afford this kit. I really hope it's HG for me! I've been getting peelies like CRAZY - way worse than ever before. But yeah, changing polish every day w/pure acetone.... *sigh* wish they'd send me a kit to review!!! lol thanks for this review tho! I'll let you know if I get it! =0)
@Lacquerish-Oh dang! I hear ya, peeling nails are such a pain. I know there are some UV lights, etc at Sally's that you might want to scope out to see if those are cheaper? Just a thought!
Post a Comment