


Hello my beauties!!!
I am here today to talk to you about Z-palettes and De-potting your eyeshadows!!! I have a YouTube Video tutorial to share and detailed depotting instructions! :)
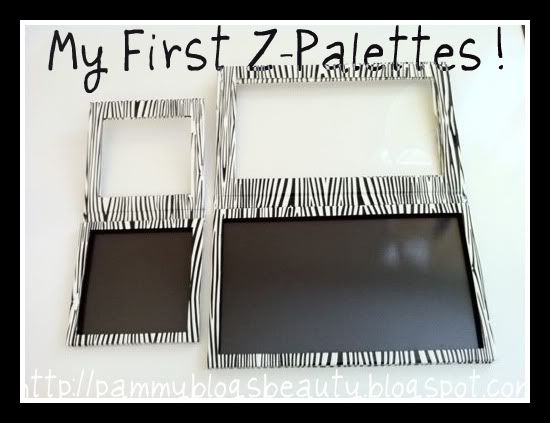
Z-palettes are blank palettes with a magnetic backing and a hard clear lid. You can get them a zpalette.com and various other sites. Z-palettes hold pan-makeup: makeup that has either been depotting from its original container or shadows/blushes that come in pan form only (brands such as Coastal Scents and MAC sell shadows in pan form).
I have wanted to get my makeup collection organized for quite some time now, and getting these z-palettes has given me the motivation to do it!!! I mean, how many of you have amazing shadow singles that fall to the bottom of your makeup drawer/organizer/train case? Do you want to eliminate the "digging" for the right shade? Well, placing your shadows in palettes can do this for you! :)
So, why are these so Z-palettes so great?
- The magnet covers the entire back of the palette.
- The magnet is incredibly strong. Your shadows will *really* stay put on this strong magnet.
- The clear lid!!! You will be able to see what is inside.
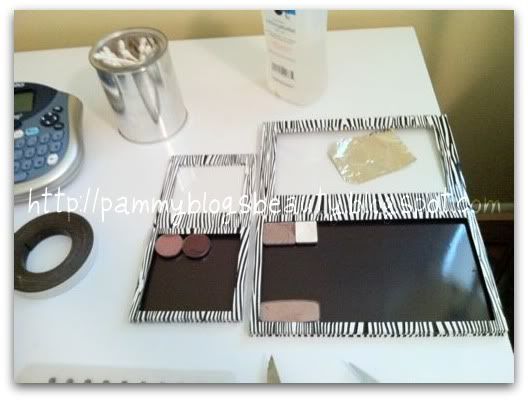
- Adorable design. I got the zebra print, but there are many other styles and colors available.
- You can save space and eliminate clutter by storing your shadows in these palettes. I have had so many single eye shadows "floating around" my makeup area. I now have them depotted and stored with ease in these cute palettes. What makes these Z-palettes unique is that there is no set "space" for a certain size pan. You can depot *any* shadow and make it fit here regardless of the pan shape or size.
- These palettes are extremely sturdy. The clear plastic is very hard and I am assuming scratch resistant. The outside of the palette is made very well and shuts securely.
- I got the smaller one for travel. I can just transfer my selected pans from the larger palette to the smaller to save space!
For more pictures, Video Tutorial, and step-by-step instructions, please keep reading after the jump.
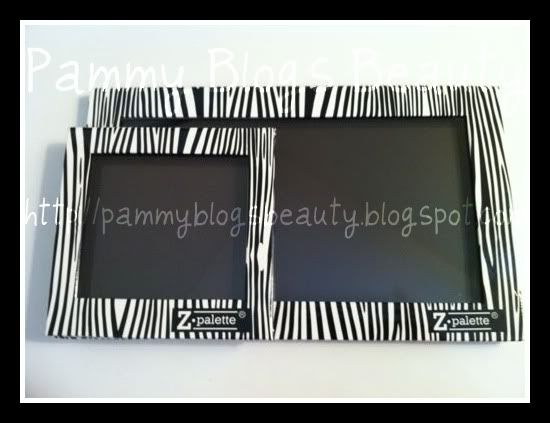
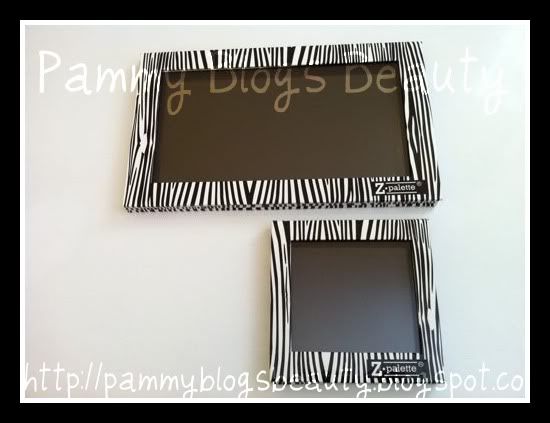
This gives you a good size comparison.
Depotting Shadow: Instructions
There are many ways to depot shadows, here is the method I used: Flat Iron Method.
Materials:
- Flat Iron
- Foil square
- Your shadows to depot
- A hot pad or potholder
- A sharp knife (or tweezers)
- Rubbing alcohol (to remove glue)
- Label Maker (if you want to label color on back of pan)
- Q-tips (to dip in alcohol to remove glue)
- Magnetic strips (for pans that are not naturally magnetic)
- Z-palette, or other palette
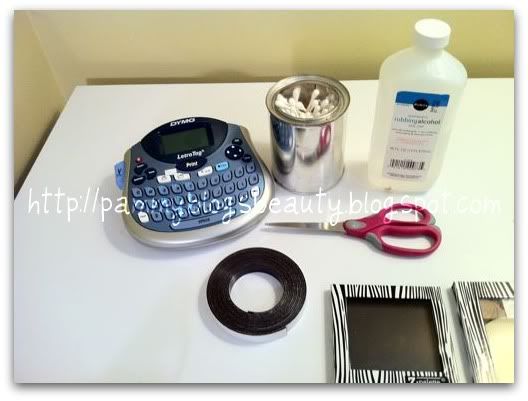
Your Workspace!
How To:
1. Plug in Flat Iron. Let it get hot.
2. Put desired shadow on top of foil on flat iron.
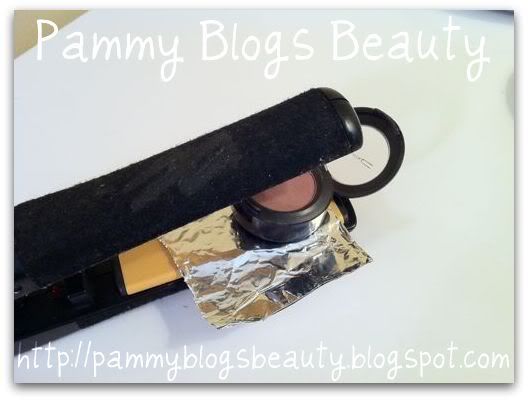
3. Let it sit for a few minutes until hot. You want to shadow to get hot enough to melt the glue. Be careful picking it up!!! It will be hot. So, don't burn yourself.
4. Very gently put knife in between the shadow container and the pan. Gently try to pry out. If the shadow is not coming up, the glue might not be melted enough. So, reheat on the flat iron until the pan pops out with ease.
5. Pop pan out and let it cool on a hot pad.
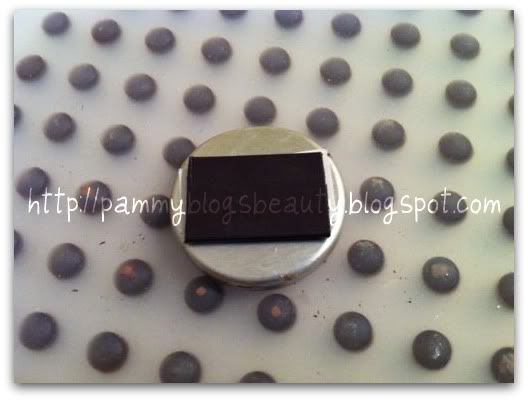
6. Turn pan over and remove any residual glue with rubbing alcohol and a cotton swab
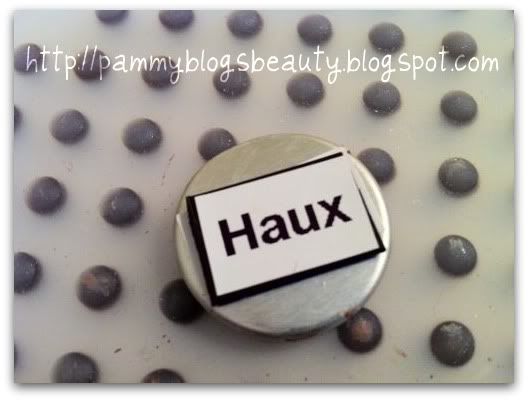
7. If you are "type A" like me, use your label maker to make a shade label for the back of the pan.
8. If the shadow pan is not magnetic, cut a small piece of magnetic strip to stick on the back. You can find magnetic strip for about $1.00 at a craft store.
9. Place pan in your palette! That's it!!!
My Video Tutorial!!! Enjoy! :)
My Video Tutorial!!! Enjoy! :)
Here is my video tutorial showing the method above! :) I practiced with some older and inexpensive shadows first until I got the hang of it. You have to be very careful when prying the shadows out as some brands glue their shadows in with a LOT of glue and those are kinda hard to de-pot. Just take your time and work slowly. If your shadow gets a little nicked/cracked, you can do some "repair" by adding a small amount of alcohol to your shadow pan.
Hope you enjoy the video! Let me know if you have any questions!!! So far, I am loving having the Z-palettes!!! If you have experience with depotting shadows, please leave any tips in the comments below.
Thanks for reading and watching!


8 comments:
Pammy great review & step by step instructions..I'll have to watch your video as well. I am so distracted however by that great little label maker, the OCD anal retentive girl in me hearts that so much!!
Hey Tracy! Thanks!!! :) And, lol...yes, I love my label maker!!! :)
Awesome post. I can't wait to use my z-palettes. I love the video as well. You should definitely keep doing youtube videos.
If you haven't already have a chance to check it out, I have a makeup competition going on right now:
http://www.funnyfacebeauty.com/2011/02/funnyface-beautys-red-carpet-makeup.html
xx
Alicia
Thanks Alicia! I hope to make more videos in the near future! :) Can't wait to read your Z-palette review as well!
Aww, it's great to see your video, Pam! LOVE your hair cut!!!
I'm going to check out your youtube channel =)
That's a great idea for the palettes, and simpler than one would think. Great tutorial!
Thanks Kim!!! :) Awwh!!! You are so sweet! :) Yes, using the flat iron method was much easier than I thought! :) XOXO!!!
i loved this post pammy! so glad you picked up some z palettes! now you're really making me want some! they look soo gooood :D hehe
Hey Agnes! Thanks girl!!! :) I am really liking these! I am sure you are still liking your homemade ones too! Those were so cute! :)
Post a Comment